You’ve played countless obbies, survived thrilling natural disaster simulations, and role-played in vibrant virtual worlds. But have you ever wondered how these Roblox experiences are made? The gap between playing a game and creating one might seem vast, but it’s more bridgeable than you think.
- Part 1: Getting Started – Your Roblox Studio Setup
- Part 2: The Three Pillars of Roblox Game Development
- Building: Giving Your Game Form and Shape
- Scripting: Bringing Your Game to Life
- 2.3 Terrain and Atmosphere: Crafting Your World’s Vibe
- Part 3: The Workflow – From Idea to Playable Prototype
- Part 4: Publishing and Sharing Your Creation
- Part 5: Essential Tips for Beginner Roblox Developers
- Frequently Asked Question
- I have no coding experience. Can I really learn Roblox scripting?
- Is Roblox Studio truly free to use, and can I make money from my games?
- What’s the biggest mistake most beginners make?
- How important is it to use free models from the Toolbox?
- What is the single most important skill to focus on as a beginner?
- My game has a bug I can’t fix. Where can I get help?
- I’ve mastered the basics. What should I learn next to improve my games?
- Conclusion
Roblox Studio is a powerful, free tool that has democratized game development, allowing millions of creators—just like you—to build, share, and even monetize their imaginations.
Mastering the basics of Roblox game development isn’t just about learning a software; it’s about unlocking a new way to express your creativity, solve complex problems, and join a thriving global community.
More Read: The Ultimate Guide to Earning Robux
Part 1: Getting Started – Your Roblox Studio Setup
Before you can build a empire, you need to lay the foundation. Let’s get your workspace ready.
Downloading and Installing Roblox Studio
You won’t find Roblox Studio on a digital storefront. The best way to get it is by going to the official Roblox Create website and clicking the “Start Creating” button. This will download the installer.
Once installed, log in with your existing Roblox account. If you don’t have one, it’s free and easy to create.
1.2 The Roblox Studio Interface: A First Look
When you first open Roblox Studio, it can feel overwhelming. Don’t worry; let’s break down the key areas:
-
The Home Tab: This is your launching pad. Here you can start new projects from templates, open recent files, and access tutorials.
-
The View Tab: This controls what you see. You can toggle the visibility of crucial windows like the Toolbox, Properties, and Output.
-
The Model, Test, and View Tabs: These are your core workspaces. You’ll use “Model” for building, “Test” for playing your game, and “View” to manage your windows.
-
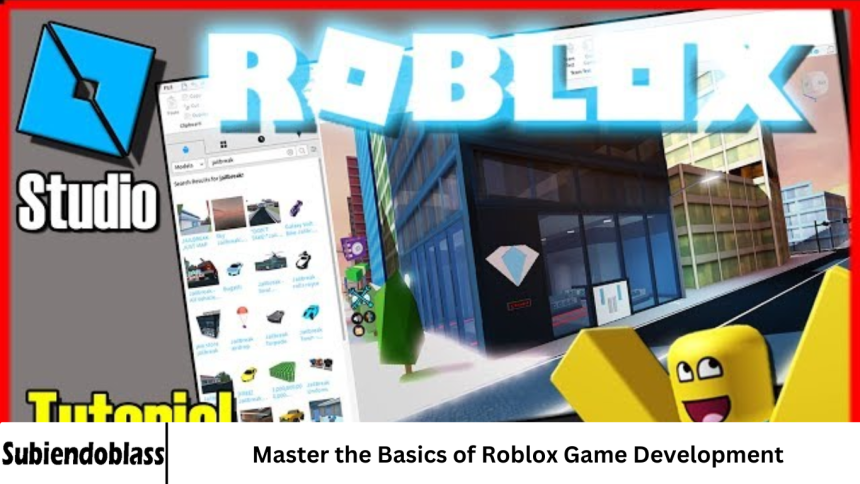
The Explorer Window: Think of this as the family tree of your game. Every part, script, and light in your game is listed here in a hierarchical view. It’s your map for navigating your game’s structure.
-
The Properties Window: This is where you fine-tune anything selected in the Explorer or the 3D view. If you select a brick, the Properties window will let you change its color, size, material, and more.
-
The Toolbox: Your best friend as a beginner. This is a library of free models, scripts, sounds, and meshes created by other developers that you can drag and drop into your game.
Pro Tip: Start with the “Baseplate” template. It gives you a flat, grassy plane to build upon—a perfect blank canvas.
Part 2: The Three Pillars of Roblox Game Development
Every Roblox experience, no matter how complex, rests on three core pillars. Mastering the basics means getting comfortable with all three.
Building: Giving Your Game Form and Shape
Building is the art of creating the 3D world your players will inhabit.
-
Parts: The fundamental building blocks. You can insert blocks, spheres, wedges, and cylinders from the “Home” or “Model” tab.
-
Moving and Resizing: Select a part and you’ll see a manipulator gizmo appear. Use the arrows to move the part along a single axis, the curves to rotate it, and the white circles to resize it.
-
The Snap Grid: Use the snap grid to place parts precisely. This is essential for creating clean, non-clipping structures.
-
Materials and Colors: Select a part and use the Properties window to change its
BrickColororMaterial. Making a part look like wood, metal, or grass is as simple as changing a dropdown menu. -
Grouping and Unioning: Select multiple parts and press Ctrl+G to group them. This treats them as a single object, making them easier to move. For a more permanent fusion, use the “Union” operation to weld them into a new, unique mesh.
Your First Exercise: Don’t just read—do! Open Roblox Studio and build a simple obstacle. Create a starting platform, a few floating steps, and a finish line. You’ve just built the core of an obby!
Scripting: Bringing Your Game to Life
If building is the body of your game, scripting is its brain. Scripting in Roblox uses a programming language called Lua, which is known for being relatively easy to learn.
-
What is a Script? A script is a set of instructions that tells the game what to do. It can make a door open, a part disappear, or a player get points.
-
Your First Script: The “Kill Brick”. Let’s create a classic Roblox element.
-
Insert a new part into your baseplate.
-
Change its color to red (so players know it’s dangerous).
-
In the Explorer window, right-click on the part, select “Insert Object,” and then choose “Script.” This places a new script inside the part.
-
Double-click the new script to open the code editor. Delete the default text and paste this:
-
-- This is a comment. The script below makes a part kill a player on touch.
local part = script.Parent -- 'script.Parent' refers to the part the script is in

part.Touched:Connect(function(hit) -- This function runs when something touches the part
    local humanoid = hit.Parent:FindFirstChild("Humanoid") -- Check if the thing that touched it was a player
    if humanoid then
        humanoid.Health = 0 -- If it was a player, set their health to zero
    end
end)
-
Click the “Play” button in the “Test” tab. Your character will spawn. Walk onto the red brick and you should die! You’ve just written your first functional game script.
-
Key Lua Concepts to Learn Next:
-
Variables: (
local myVariable = 5) Containers that store data. -
Functions: (
function myFunction() ... end) Reusable blocks of code. -
Events: (
Touched,Clicked) Actions that happen in the game, which your scripts can listen for and respond to. -
Conditionals: (
if ... then ... end) Let your code make decisions.
-
2.3 Terrain and Atmosphere: Crafting Your World’s Vibe
A flat baseplate is functional, but a world with hills, water, and moody lighting is immersive.
-
Terrain Editor: Find this in the “Home” or “Model” tab. This powerful tool lets you sculpt landscapes, add water, and paint textures like grass, sand, and rock. Use the “Add” tool to create mountains and the “Subtract” tool to carve out valleys and lakes.
-
Lighting and Atmosphere: The
Lightingservice in the Explorer controls the global look of your game. You can change the time of day, create fog, and add a “skybox” (the distant scenery you see on the horizon). A simple change from a bright blue sky to a deep, starry night can completely transform the feel of your experience.
Part 3: The Workflow – From Idea to Playable Prototype
Knowing the tools is one thing; knowing how to use them in sequence is another.
-
Plan: Start small. Don’t try to build the next “Adopt Me!” for your first project. Sketch your idea on paper. “A simple obby with 5 obstacles” is a perfect goal.
-
Blockout: Use basic, uncolored parts to lay out the geometry of your level. Where does the player start? Where do they jump? Where is the goal? This is the skeleton of your game.
-
Script: Add functionality. Create kill bricks, checkpoints that spawn players, and a script at the end that says “You Win!”
-
Refine and Polish: Once the core gameplay works, it’s time to make it look good. Apply materials, sculpt terrain, add lighting, and insert decorative models from the Toolbox.
-
Test, Test, Test! Use the “Test” tab to play your game. You will find bugs—this is normal! Check for places where players can get stuck, parts that are too hard to jump on, and scripts that don’t fire. Ask a friend to play it; they will find issues you never noticed.
Part 4: Publishing and Sharing Your Creation
You’ve built a game—now it’s time to share it with the world!
-
In Roblox Studio, go to File > Save to Roblox As. to publish your game. Give it a name and description.
-
Configure Your Game: Go to the Roblox website, find your creation under “Creations,” and click the gear icon to configure it. You can upload icons, set the genre, and control who can play (Public, Friends, Private).
-
Publish: Make sure to set your game’s visibility to “Public.” Now, anyone on Roblox can find and play your game by searching for its name!
Part 5: Essential Tips for Beginner Roblox Developers
-
Embrace the Roblox Developer Hub: The official Roblox Developer Hub is your most valuable resource. It has full API references, in-depth tutorials, and best practices.
-
Learn by Doing and Deconstructing: The best way to learn is by tinkering. Open up the free models you get from the Toolbox and look at their scripts. Try to understand what each line does. Change a variable and see what happens.
-
Don’t Be Afraid of the Community: The Roblox developer community is huge and generally very helpful. Use the DevForum to ask questions when you’re stuck. Chances are, someone has already solved the problem you’re facing.
-
Start Small, Iterate Often: Your first ten games should be small, focused projects. A button-clicker simulator, a simple obby, a tiny hide-and-seek map. Each one will teach you something new. Complexity comes with experience.
Frequently Asked Question
I have no coding experience. Can I really learn Roblox scripting?
Absolutely, yes! Roblox uses Lua, which is one of the most beginner-friendly programming languages. It’s designed to be relatively easy to read and understand. Start with simple concepts like making a light turn on or a part change color when you click it. The key is to start with small, manageable scripts and build from there. Many of the most successful Roblox developers started with zero coding knowledge.
Is Roblox Studio truly free to use, and can I make money from my games?
Yes, Roblox Studio is completely free to download and use. There are no hidden fees or subscriptions required to start developing. Furthermore, you can absolutely earn money from your games through Roblox’s Developer Exchange (DevEx) program. Once you meet certain requirements, you can convert the in-game Robux earned from passes, developer products, and game visits into real currency.
What’s the biggest mistake most beginners make?
The most common mistake is tackling a project that is too ambitious right away. Beginners often dream of creating a complex RPG or simulator as their first game, which leads to frustration and burnout. The best strategy is to start incredibly small—like a simple obby with 5 obstacles or a “clicker” game. Completing small projects builds confidence, teaches you the complete development cycle, and provides a solid foundation for larger games later.
How important is it to use free models from the Toolbox?
- The Toolbox is a fantastic resource for beginners to quickly add assets like trees, rocks, or simple scripts to their games. However, it’s a double-edged sword.
- Pros: It speeds up development and helps you learn by allowing you to deconstruct how others build and script.
- Cons: Some free models can contain inefficient or even malicious code that can break your game.
Our advice: Use free models sparingly for simple art assets, but try to write your own scripts from the start. This ensures you understand your game’s code and keeps it optimized.
What is the single most important skill to focus on as a beginner?
While building and scripting are both crucial, the most important skill is problem-solving. Game development is a continuous process of identifying problems (e.g., “This door won’t open,” “The player gets stuck here”) and figuring out a solution, often through scripting or design changes. Learning how to break down a big problem into smaller, solvable steps and how to search for solutions (using the Developer Hub and DevForum) is the true key to success.
My game has a bug I can’t fix. Where can I get help?
You are not alone! Every developer encounters bugs. The best place to seek help is the official Roblox DevForum. Before posting, search to see if someone has already asked your question. When you do post, be polite, provide a clear description of the problem, and include your relevant code or a screenshot. The community is generally very helpful and responsive to those who show they’ve put in the effort first.
I’ve mastered the basics. What should I learn next to improve my games?
Once you’re comfortable with the fundamentals, focus on these areas to level up your skills:
- Advanced Scripting Concepts: Dive into ModuleScripts to organize your code, and learn about RemoteEvents for communication between the client and server (essential for multi-player mechanics).
- UI/UX Design: Learn how to create intuitive and visually appealing user interfaces (menus, health bars, buttons) using Roblox’s built-in UI system.
- Game Design Theory: Study what makes games fun. Learn about pacing, reward systems, and balanced difficulty to create more engaging experiences beyond just the technical build.
Conclusion
Mastering the basics of Roblox game development is a rewarding achievement. You’ve learned to navigate Roblox Studio, understand the core concepts of building and scripting, and you’ve published your very own game. This is not the end, but a fantastic beginning.
The path from here involves consistent practice, continuous learning, and a healthy dose of patience.
Don’t get discouraged by bugs or complex challenges—they are the puzzles that will make you a better developer. Keep building, keep scripting, and keep sharing your unique vision with the millions of players on the Roblox platform.


